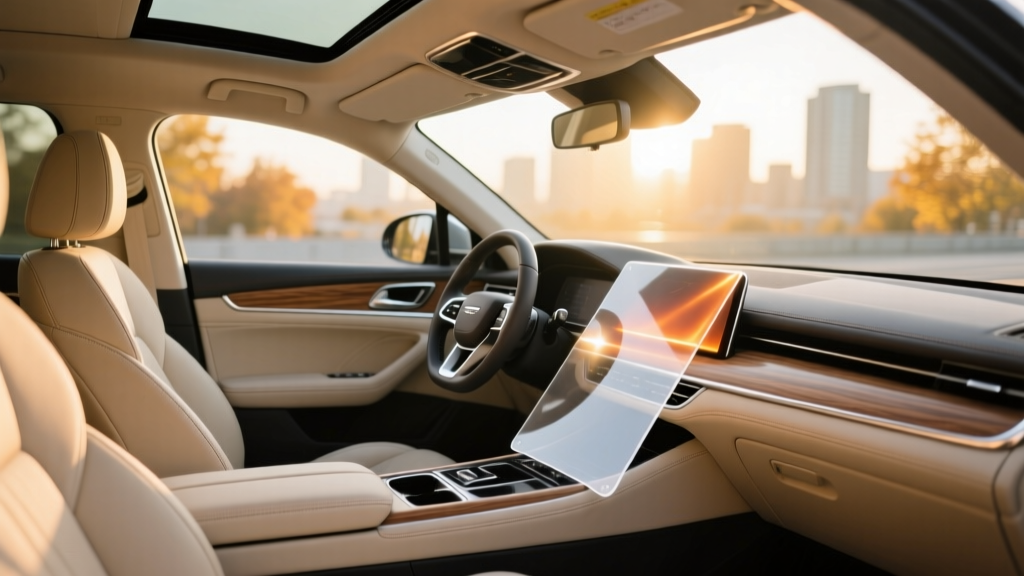
Seasonal Heat Insulation for Cars (2026)
Heat is one of the quietest ?interior killers? your car will ever face. It doesn?t announce itself with a warning light, but over time it fades plastics, dries out leather, weakens adhesives behind trim panels, and can even lead to rattles as materials expand and contract. If you?ve ever climbed into a scorching cabin, felt a steering wheel too hot to touch, or watched your dashboard start to look chalky, you?ve already seen the effects.
Seasonal heat insulation isn?t only about comfort?though a cooler cabin is a big win. It?s also about protecting your car interior investment year-round: reducing UV damage, keeping cabin temperatures more stable, easing the load on your A/C system, and improving sound and thermal insulation. With a few smart upgrades and seasonal habits, you can make a noticeable difference without turning your car into a full custom build.
This guide breaks down what works (and what doesn?t), how to prioritize your efforts by season, and step-by-step ways to add heat insulation and interior protection that actually lasts.
Why Seasonal Heat Protection Matters for Car Interiors
Cabin temperatures can rise fast?especially in darker vehicles, cars with large windshields, or interiors with lots of glass exposure. Even moderate outside temperatures can create extreme heat inside the car. That heat accelerates wear on the materials you touch every day.
What heat does to common interior materials
- Dashboard & plastics: UV + heat causes fading, brittleness, and surface cracking over time.
- Leather: dries out, stiffens, and can crack if not conditioned and shielded from repeated heat cycles.
- Vinyl & soft-touch trim: can get glossy, sticky, or ?melted? feeling when coatings break down.
- Adhesives: heat weakens glue behind headliners, pillars, and door card inserts (hello sagging headliner).
- Electronics: screens and sensors can suffer from repeated heat soak, especially when parked in direct sun.
The bonus benefit: A/C efficiency
Better insulation and sun control means the A/C has less heat to fight. You?ll often get faster cool-down times, less fan noise, and potentially better fuel economy (or range, in EVs) during peak summer.
Season-by-Season Strategy (What to Do and When)
Spring: Prep and prevention
Spring is your best time to set the foundation before high heat arrives. Focus on blocking UV, restoring surfaces, and addressing small issues before they become expensive.
- Apply UV-protectant to dash, door panels, and console plastics.
- Deep clean and condition leather or vinyl seats.
- Inspect window seals and door weatherstripping to reduce hot air intrusion.
- Plan installs like window tint or insulation while temps are mild (adhesives cure better).
Summer: Reduce heat load and protect daily touchpoints
Summer is about aggressive heat management: stop solar energy at the glass, keep surfaces protected, and avoid heat traps.
- Use a high-quality reflective windshield sunshade every time you park outside.
- Consider ceramic window tint for heat rejection (where legal).
- Use breathable seat covers or ventilated cushions if your seats get painfully hot.
- Crack windows slightly (if safe/appropriate) or use rain guards to vent heat.
Fall: Maintenance and sealing
Fall is the ?reset season.? Repair, reapply protectants, and address trim issues caused by summer expansion.
- Reapply interior UV protection (many products last 4?12 weeks depending on exposure).
- Clean and treat rubber seals to maintain elasticity.
- Listen for new squeaks/rattles?often heat-related fasteners and clips settling.
Winter: Insulation isn?t just for heat
Winter protection focuses on maintaining stable cabin conditions and controlling condensation. Insulation upgrades help retain heat, reduce fogging, and keep cabin surfaces from feeling icy.
- Use floor liners and carpet insulation to reduce cold soak through the floor.
- Check cabin air filter (restricted airflow makes defrost less effective).
- Protect leather from dry winter air with a gentle conditioner.
Key Heat Insulation Areas Inside a Car (Prioritized)
1) Glass (highest impact per dollar)
Most cabin heat enters through windows. Managing solar gain at the glass typically produces the biggest comfort improvement.
- Windshield sunshade: blocks direct radiation on the dash and steering wheel.
- Quality tint (especially ceramic): reduces infrared heat while keeping clarity.
- Rear window shade (cargo area UV): protects rear seats and plastics in hatchbacks/SUVs.
2) Roof/headliner (big heat source when parked)
A hot roof panel radiates heat downward. Adding insulation under the headliner can reduce heat soak, and also quiet road noise.
3) Doors (moderate heat, solid sound benefits)
Door skins and inner panels heat up in sun and let in noise. Door insulation can improve both thermal comfort and audio quality.
4) Floor and firewall (best for driving comfort)
The firewall and transmission tunnel are major heat paths while driving?especially on performance cars, trucks, and vehicles that tow. Insulating these areas can reduce that ?hot feet? feeling and stabilize cabin temps.
Step-by-Step: Simple Heat Protection You Can Do Today
Step-by-step: Choosing and using a windshield sunshade
- Measure your windshield (or search by vehicle fit) to avoid gaps that let sun hit the dash.
- Pick a reflective, multi-layer shade (foam core or insulated accordion styles usually block more heat than thin fabric).
- Install tightly with the reflective side facing out and push the edges into the glass perimeter.
- Use the visors to lock the shade in place.
- Pair it with a dash protectant so the dash doesn?t dry out on days you forget the shade.
Real-world example: If your steering wheel is routinely too hot to hold after work, a fitted sunshade alone often drops wheel and dash surface temps enough to make the car bearable within minutes.
Step-by-step: Quick interior UV + heat defense routine (15?25 minutes)
- Dry dust first using a microfiber towel to prevent micro-scratches.
- Clean touchpoints (steering wheel, shifter, armrests) with an interior-safe cleaner.
- Apply UV protectant to dash, door tops, and center console (avoid glass and pedals).
- Buff to a natural finish to reduce glare and prevent greasy buildup.
- Condition leather/vinyl seats lightly?focus on bolsters and seatbacks that get sun exposure.
Step-by-Step: Upgrading Thermal Insulation (DIY-Friendly Options)
If you want more than surface protection, adding insulation materials behind trim can noticeably reduce heat transfer. You don?t have to strip the whole car?start with one area and build from there.
Option A: Door insulation (balanced difficulty and payoff)
Goal: reduce heat and noise through the door skin.
- Remove the door panel carefully using trim tools (avoid metal screwdrivers that mar surfaces).
- Inspect the moisture barrier and avoid tearing it?this keeps water out of your cabin.
- Add butyl sound deadener (small to medium coverage is fine) to the inner door skin to reduce vibration and radiant heat.
- Add a closed-cell foam layer on top for thermal insulation and to reduce panel resonance.
- Re-seal the moisture barrier and reinstall the panel, ensuring clips align.
Tip: If you drive in heavy rain or wash your car often, moisture barrier integrity matters more than perfect insulation coverage.
Option B: Roof/headliner insulation (best for parked heat soak)
Goal: reduce radiant heat from the roof into the cabin.
- Remove trim pieces (A/B/C pillar trims) as needed and lower the headliner gently.
- Clean the roof metal so adhesive-backed materials bond properly.
- Apply sound deadener in sections between roof supports (don?t block drain paths for sunroofs).
- Add lightweight thermal insulation (closed-cell foam or specialized automotive thermal liner).
- Reinstall headliner carefully to avoid creases or broken clips.
Real-world example: In an SUV with a panoramic roof, heat soak can be intense. Pairing quality tint on the glass with roof insulation can make summer parking far less punishing.
Option C: Floor and firewall insulation (for ?hot feet? and long drives)
Goal: reduce heat from the drivetrain and road surface.
- Remove floor mats and lift carpeting where possible (start in the front footwells).
- Apply sound deadener to large flat metal areas, especially the transmission tunnel.
- Add a thermal barrier (closed-cell foam or a dedicated heat shield material) on top.
- Reinstall carpet and mats ensuring nothing interferes with pedal movement.
Safety note: Never place thick insulation where it can bunch up under pedals or restrict pedal return.
Product Recommendations and Comparisons (What?s Worth Buying)
Window tint: Dyed vs. carbon vs. ceramic
- Dyed tint: budget-friendly, improves glare, limited heat rejection, can fade over time.
- Carbon tint: better heat performance than dyed, good value, stable color.
- Ceramic tint: best heat rejection and clarity, typically the top choice for hot climates, higher price.
Buying tip: Ask for infrared (IR) and total solar energy rejected (TSER) specs, not just ?percent darkness.? A lighter ceramic tint can outperform a darker dyed tint for heat reduction.
Sunshades: Universal vs. vehicle-specific
- Universal: cheaper, often leaves gaps, can sag and fall.
- Vehicle-specific: better seal at the edges, faster daily use, more effective at protecting dashboards and infotainment screens.
Insulation materials: What each layer does
- Butyl sound deadener mats: reduces vibration and helps with some radiant heat; great base layer.
- Closed-cell foam (CCF): strong thermal and decoupling layer; helps prevent panel buzz and reduces heat transfer.
- Reflective thermal barriers: best when facing an air gap; useful near firewalls and high-heat areas.
Quick recommendation: For most daily drivers, a combination of butyl + closed-cell foam offers the best mix of comfort, noise reduction, and install simplicity.
Common Mistakes to Avoid
- Choosing tint solely by darkness: you want heat rejection (IR/TSER), not just a darker look.
- Overusing glossy protectants: they can create windshield glare and attract dust; stick to a satin/natural finish.
- Blocking drain paths: especially in doors and sunroof channels?this can cause leaks and moldy odors.
- Skipping surface prep: insulation adhesives fail on dusty or oily metal; clean with an appropriate prep solution first.
- Installing thick materials near pedals or seat rails: anything that shifts can become a safety hazard.
- Assuming more coverage always means better: strategic placement often works well and avoids adding unnecessary weight.
Practical Heat-Protection Tips That Add Up
- Park with intention: even partial shade over the dashboard area is a win.
- Rotate your parking direction: don?t bake the same side of the interior every day.
- Use light interior accessories: darker seat covers and dash mats absorb more heat.
- Vent before blasting A/C: open doors for 20?30 seconds to dump heat, then start cooling.
- Protect high-touch surfaces: steering wheel covers (quality, non-slip) can prevent heat damage and improve comfort.
FAQ: Seasonal Heat Insulation and Interior Protection
Does window tint really reduce cabin heat, or is it mostly for looks?
Quality tint absolutely reduces heat?especially ceramic films designed to block infrared energy. The difference is most noticeable on sunny days and during long drives where sun load keeps adding heat to the cabin.
Is a dash cover better than using protectant?
They do different jobs. A dash cover blocks direct sunlight and can reduce surface temperatures, while a protectant helps prevent drying and fading. In very hot climates, using both is a strong combo?just make sure the dash cover fits well so it doesn?t interfere with airbags or create windshield glare.
Will adding insulation make my car noticeably quieter too?
Often, yes. Door, roof, and floor insulation upgrades typically reduce road noise and panel vibration. Many owners notice improved audio clarity after door treatment, even with factory speakers.
Can I insulate my car myself, or should I go to a shop?
Sunshades and interior protection are easy DIY. Door insulation is a solid weekend project if you?re comfortable removing trim. Roof/headliner work is more delicate; if your car has a sunroof or lots of airbags in the pillars, a professional install may be worth it.
How often should I reapply interior UV protectant?
For daily drivers parked outside, every 4?8 weeks is common. If you park in a garage or use sunshades and tint, you can often stretch it longer. If water no longer beads or the finish looks uneven, it?s time to reapply.
Will insulation cause moisture or mold issues?
It can if moisture barriers are damaged or if materials trap water. Use closed-cell foam (it doesn?t absorb water like open-cell foam), keep door drain paths clear, and make sure the vapor/moisture barriers are properly sealed during reassembly.
Actionable Next Steps
- This week: buy a fitted windshield sunshade and start using it daily.
- This month: apply a quality UV protectant to interior plastics and condition leather/vinyl seating surfaces.
- Before peak summer: consider ceramic window tint (within local legal limits) for real heat rejection.
- Weekend project: insulate doors or the front floor area if you want a noticeable comfort upgrade on drives.
Seasonal heat insulation and interior protection doesn?t have to be complicated?small upgrades done consistently will keep your cabin looking newer, feeling more comfortable, and holding value longer. For more practical interior care and upgrade walkthroughs, explore the latest guides on carinteriormix.com.